




How to Speed Up a Windows 10 Laptop Without Buying New RAM — 10 Proven Methods (India 2026)
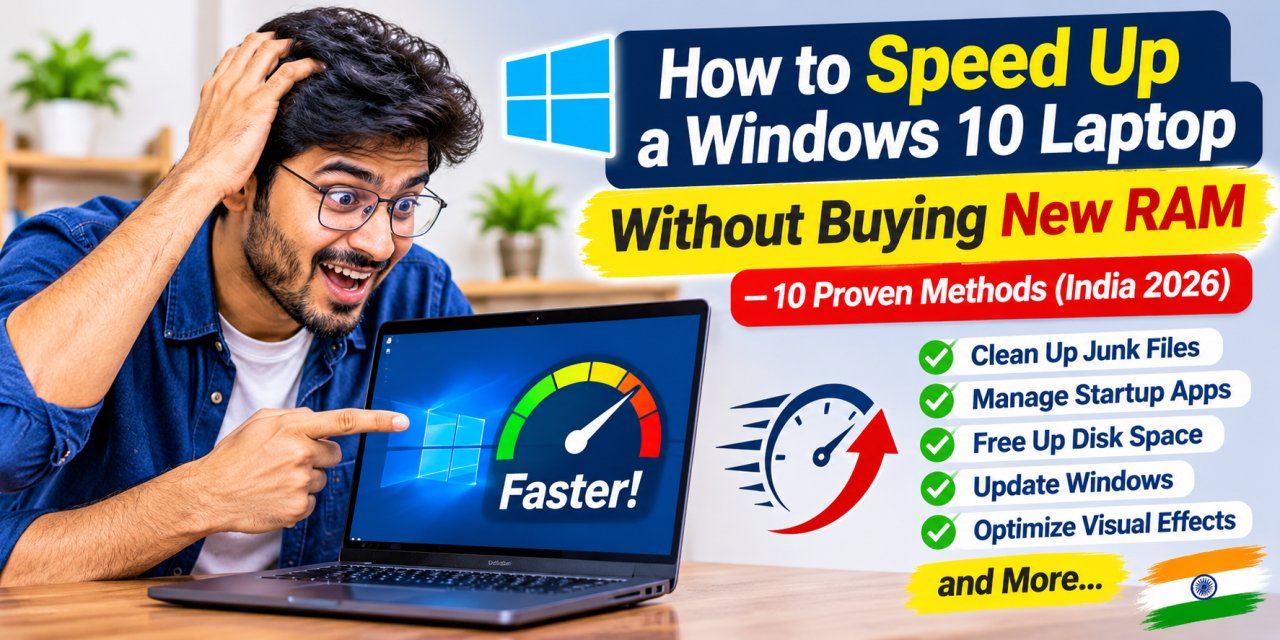

How to Speed Up a Windows 10 Laptop Without Buying New RAM — 10 Proven Methods (India 2026)
Last Updated: November 2026 | Reading Time: 10 min | By InfotechKart
My laptop was not always this slow. When I first bought it, Windows 10 loaded in seconds, files opened instantly, and multitasking felt smooth. But somewhere between the updates, the installed software, and months of daily use, it started dragging. Every click took longer. Every tab took more time. The fan never stopped running.
The first advice most people get is buy more RAM. But the truth is, most Windows 10 laptops slow down for reasons that have nothing to do with RAM. Startup bloat, overheating, a fragmented hard drive, wrong power settings, and accumulated junk all quietly drain performance — and every one of these problems can be corrected without spending money on new hardware. This guide covers 10 methods tested on real Windows 10 laptops.
Why Does a Windows 10 Laptop Become Slow Over Time?
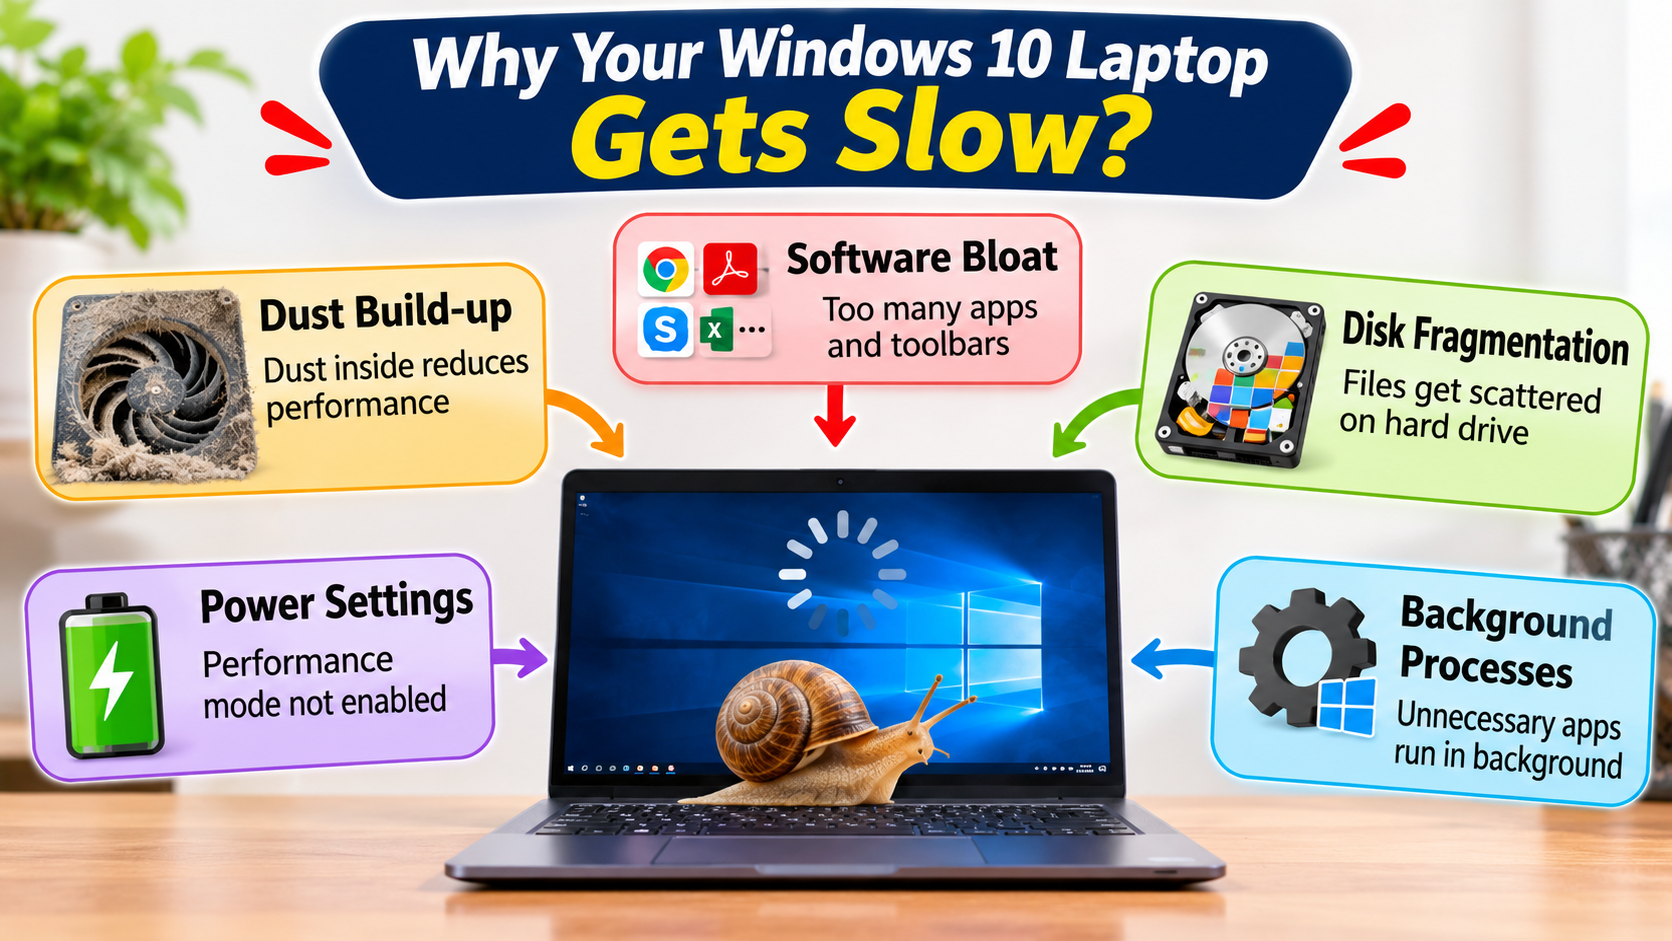
Common reasons why a Windows 10 laptop loses performance over time
Before jumping into the fixes, it helps to understand why the problem occurs. A laptop does not slow down overnight — it is a gradual process caused by several technical factors.
📦 Software Accumulation
Every installed program adds background services, startup entries, and scheduled tasks — even programs you never open anymore continue running invisible processes.
🌡️ Thermal Throttling
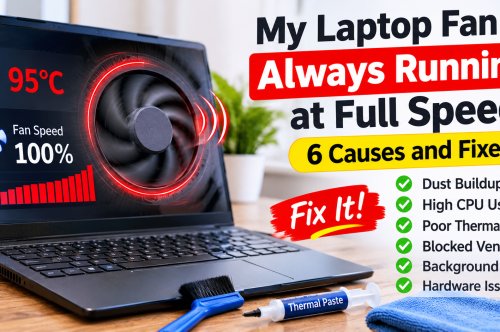
Dust-clogged vents cause the CPU to reduce its own clock speed by 30–60% to avoid overheating. This is called thermal throttling and is one of the most common hidden causes of slowdowns.
💽 HDD Fragmentation
On traditional hard disk drives, files scatter across the disk over time. The drive head travels further to read a single file, causing delays that feel like system-wide lag.
⚡ Wrong Power Settings
The default "Balanced" power plan throttles processor speed to save battery. On a plugged-in laptop, this causes micro-delays in every operation that add up into noticeable sluggishness.
Disable Startup Programs
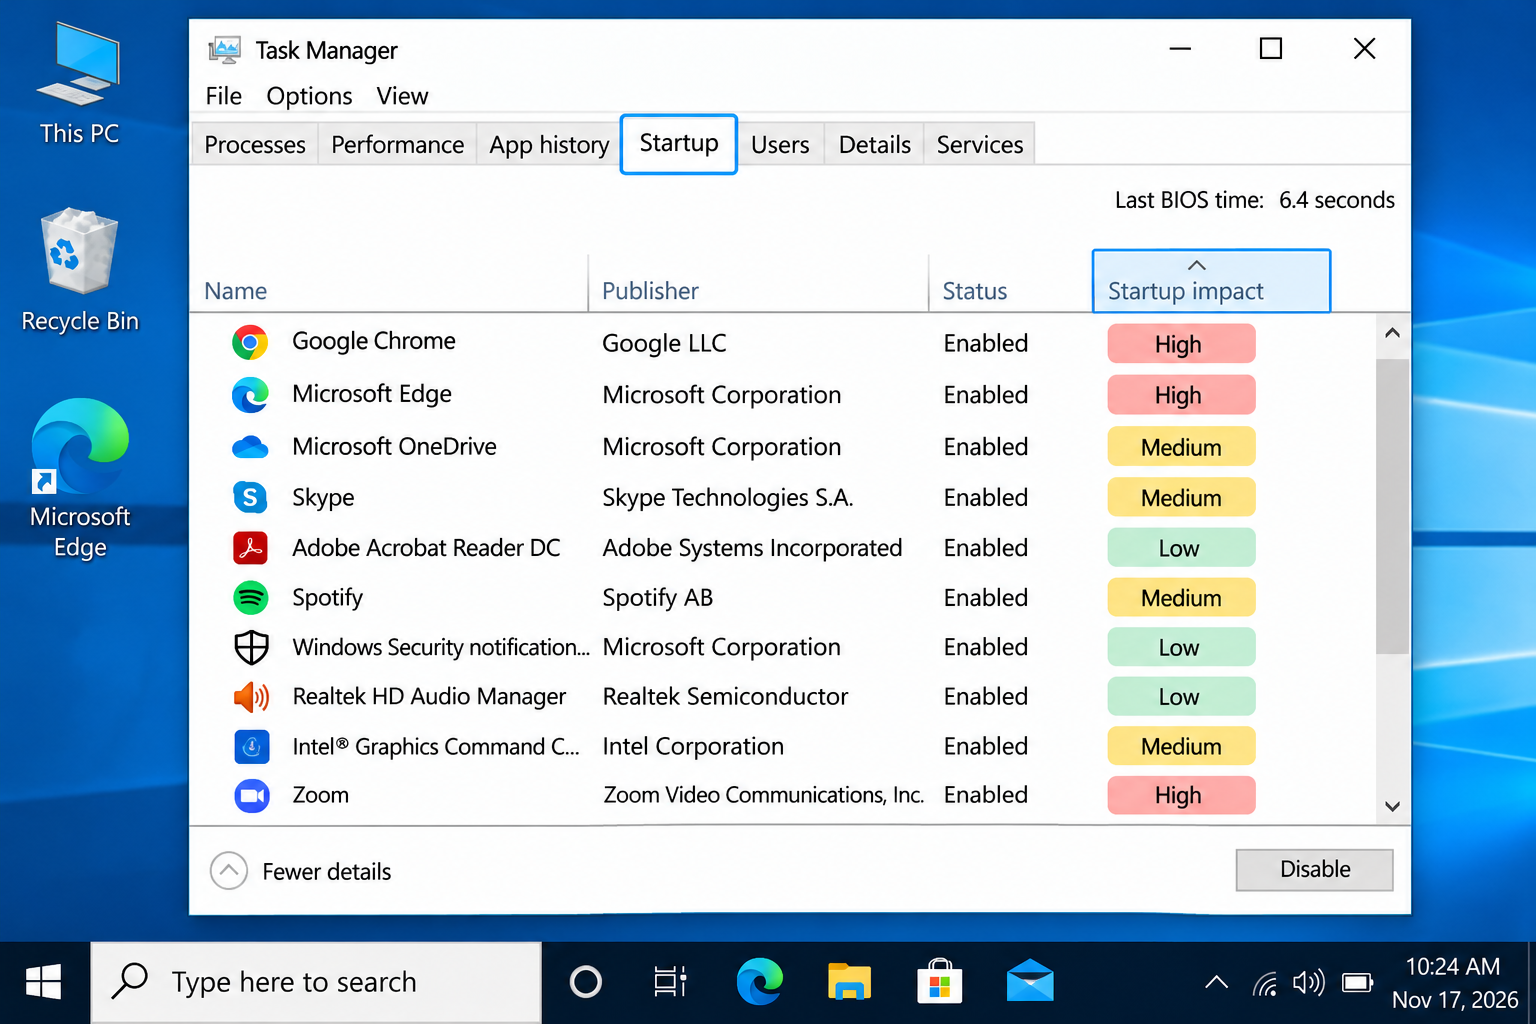
Task Manager → Startup tab — disable High impact programs you don't need at boot
This is the fastest and most impactful change most users can make — in under three minutes. Every time Windows 10 starts, it automatically launches a list of programs in the background. Many are unnecessary: messaging apps, cloud storage clients, manufacturer update assistants, media players, and browser helpers all add themselves to startup during installation and keep loading at every boot even when you never use them.
🔧 How to do it:
1. Press Ctrl + Shift + Esc to open Task Manager
2. Click the Startup tab
3. Right-click any High or Medium impact program you don't need at boot → Disable
4. Never disable antivirus, Windows Defender, or display/audio drivers
Technical reason: On a laptop with 4 GB RAM, 8–10 startup programs can collectively consume 700 MB to 1.2 GB of RAM before you open a single application — leaving almost nothing for actual work.
Change Power Plan to High Performance
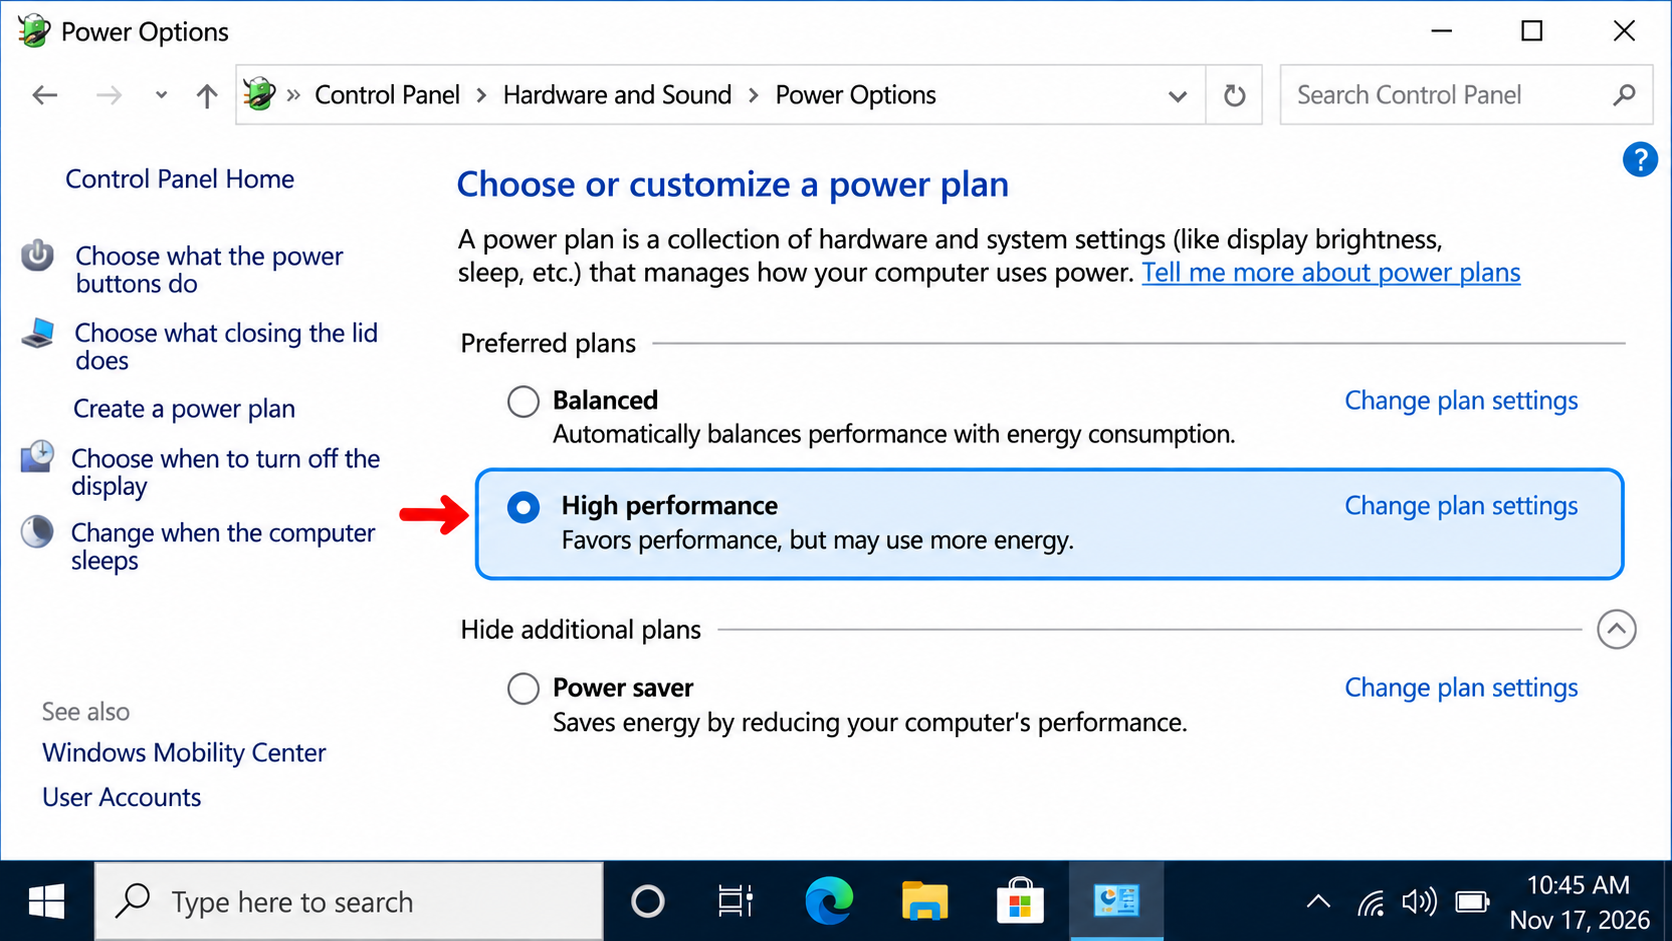
Control Panel → Power Options → Select High Performance for instant responsiveness boost
Windows 10 ships with a "Balanced" power plan as default. This plan deliberately throttles processor speed during low-demand periods to save battery. The result is a small but constant delay every time the CPU needs to ramp up — when you press a key, open a file, or switch a window. These micro-delays accumulate across hundreds of operations and produce the "sluggish" feeling users notice most.
🔧 How to do it:
1. Open Control Panel → Power Options
2. Select High Performance (click "Show additional plans" if not visible)
3. Bonus — Unlock Ultimate Performance: Open Command Prompt as Administrator and run:
powercfg -duplicatescheme e9a42b02-d5df-448d-aa00-03f14749eb61
Note: High Performance uses more battery. Switch back to Balanced when running on battery power — use High Performance only when plugged in.
Disable Windows Visual Effects and Animations
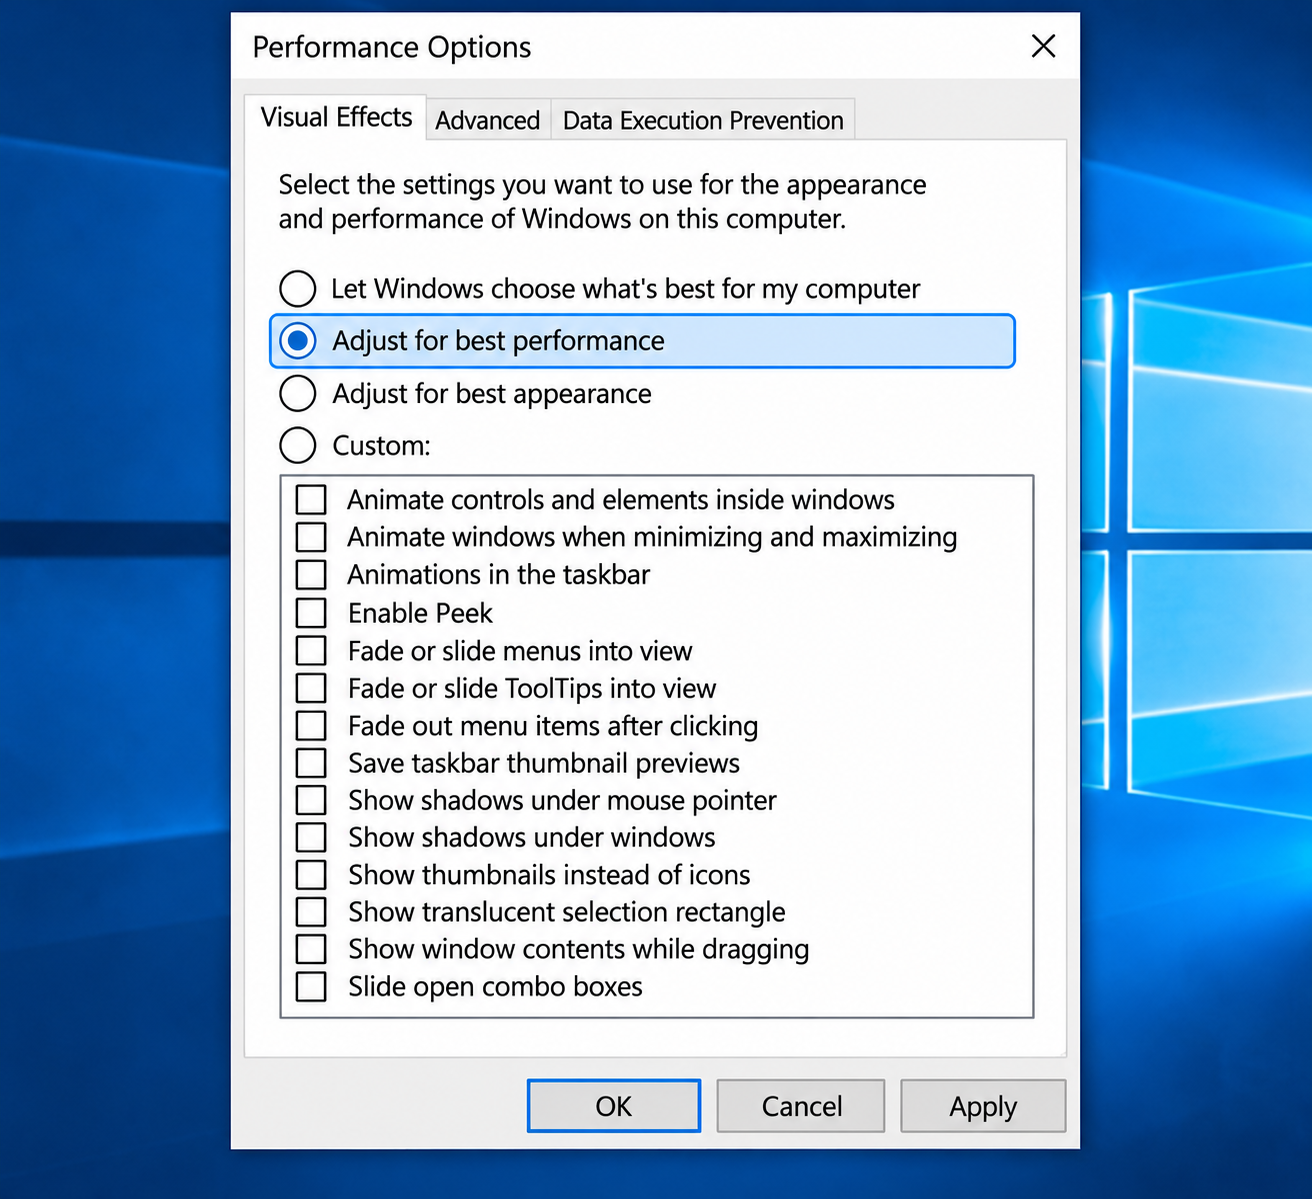
Performance Options → "Adjust for best performance" removes all animations instantly
Windows 10 renders continuous visual animations — window open/close fades, taskbar transitions, drop shadows, Aero Peek previews, and smooth scroll effects. On high-end laptops with dedicated graphics these run invisibly. On budget laptops with Intel UHD or older integrated graphics, they consume enough GPU bandwidth to visibly slow the entire interface.
🔧 How to do it:
1. Right-click This PC → Properties → Advanced System Settings
2. Under Performance click Settings → Select "Adjust for best performance"
3. Optionally re-enable: "Smooth edges of screen fonts" and "Show thumbnails instead of icons" — these have minimal performance cost
Technical reason: Integrated graphics use shared system RAM. Visual effects keep the GPU's memory controller in active use, creating memory bus contention where the CPU ends up waiting for memory access the GPU is currently using for rendering animations.
Run Disk Cleanup and Free Up Drive Space
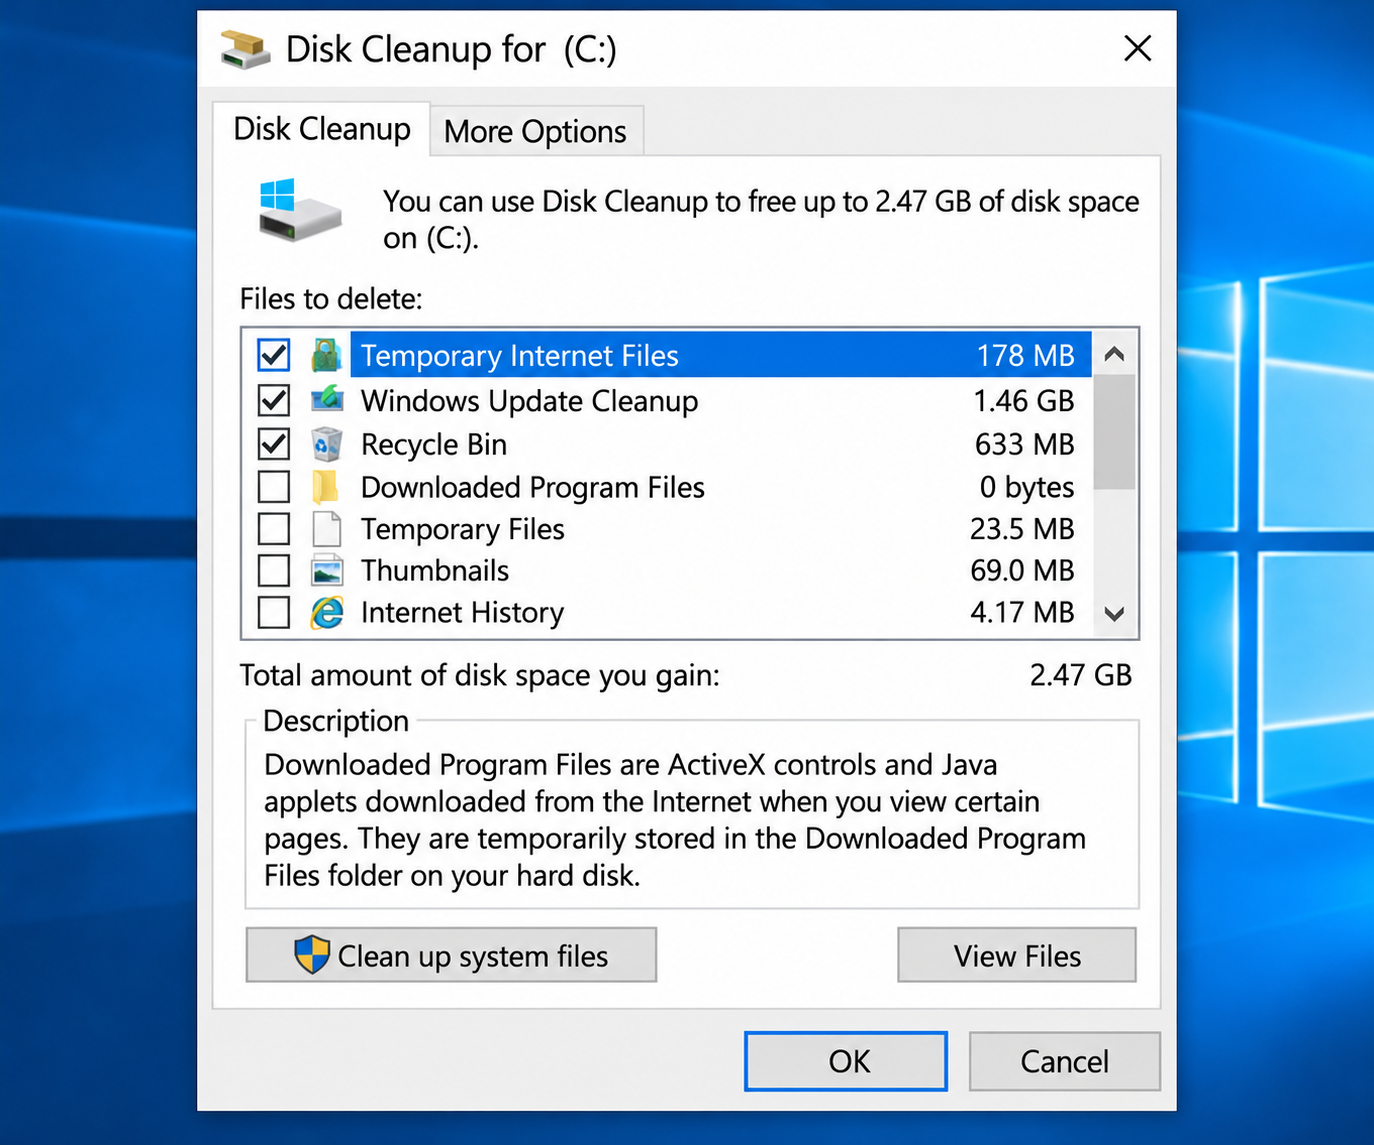
Disk Cleanup → "Clean up system files" removes Windows Update remnants — often 2–8 GB
Windows 10 accumulates significant junk over time — temporary installation files, Windows Update download caches, error report logs, thumbnail image caches, and Recycle Bin contents. When the system drive drops below 10–15% free space, Windows performance drops measurably. The system uses free disk space as virtual memory overflow, as a temporary processing area, and for update staging.
🔧 How to do it:
1. Type Disk Cleanup in Start menu → Open it → Select C: drive
2. Click "Clean up system files" — this reveals Windows Update remnants (often 2–8 GB on older machines)
3. Check all categories → Click OK → Confirm deletion
Upgrade HDD to SSD — The Biggest Single Improvement
This is the one hardware upgrade in this guide — and it is not RAM
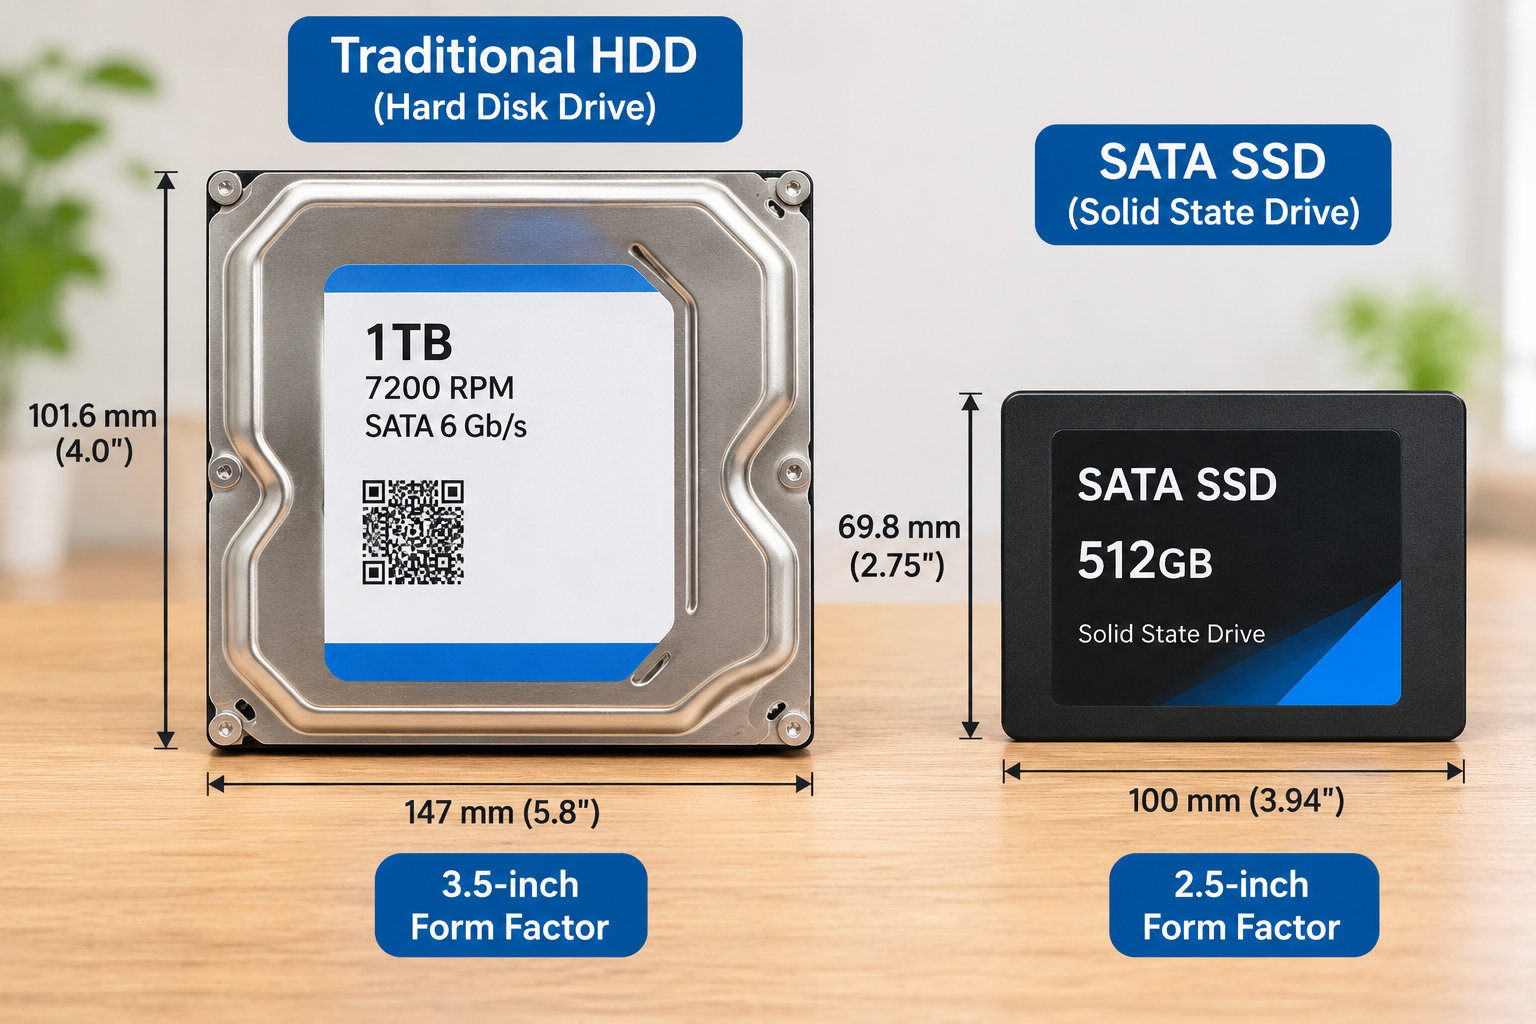
HDD vs M.2 NVMe SSD — same job, 100× speed difference
Replacing a traditional hard disk drive with a solid-state drive is the single most dramatic speed improvement available for any laptop. It is not an exaggeration to say it can make a five-year-old laptop feel like a new machine. A hard disk drive stores data on spinning magnetic platters and reads it with a physical moving arm — this mechanical process introduces delays of 5–15 milliseconds per operation. A solid-state drive reads data electronically, with access times roughly 100 times faster.
Real World Impact After SSD Upgrade
Windows 10 Boot Time
HDD: 60–90 sec
SSD: 10–15 sec
App Launch Speed
HDD: 8–15 sec
SSD: 1–3 sec
File Transfer 10 GB
HDD: 4–6 min
SSD: 15–30 sec
Overall Feel
HDD: Sluggish
SSD: Like New
Best SSD Upgrades for Your Laptop
All available on InfotechKart — Genuine Products · Manufacturer Warranty · Delivery Across India



* Most laptops support M.2 NVMe Gen3 or Gen4. Gen5 SSDs are backward compatible and work in older slots at reduced speeds. All above are M.2 2280 form factor.
Clean Laptop Vents and Fix Overheating
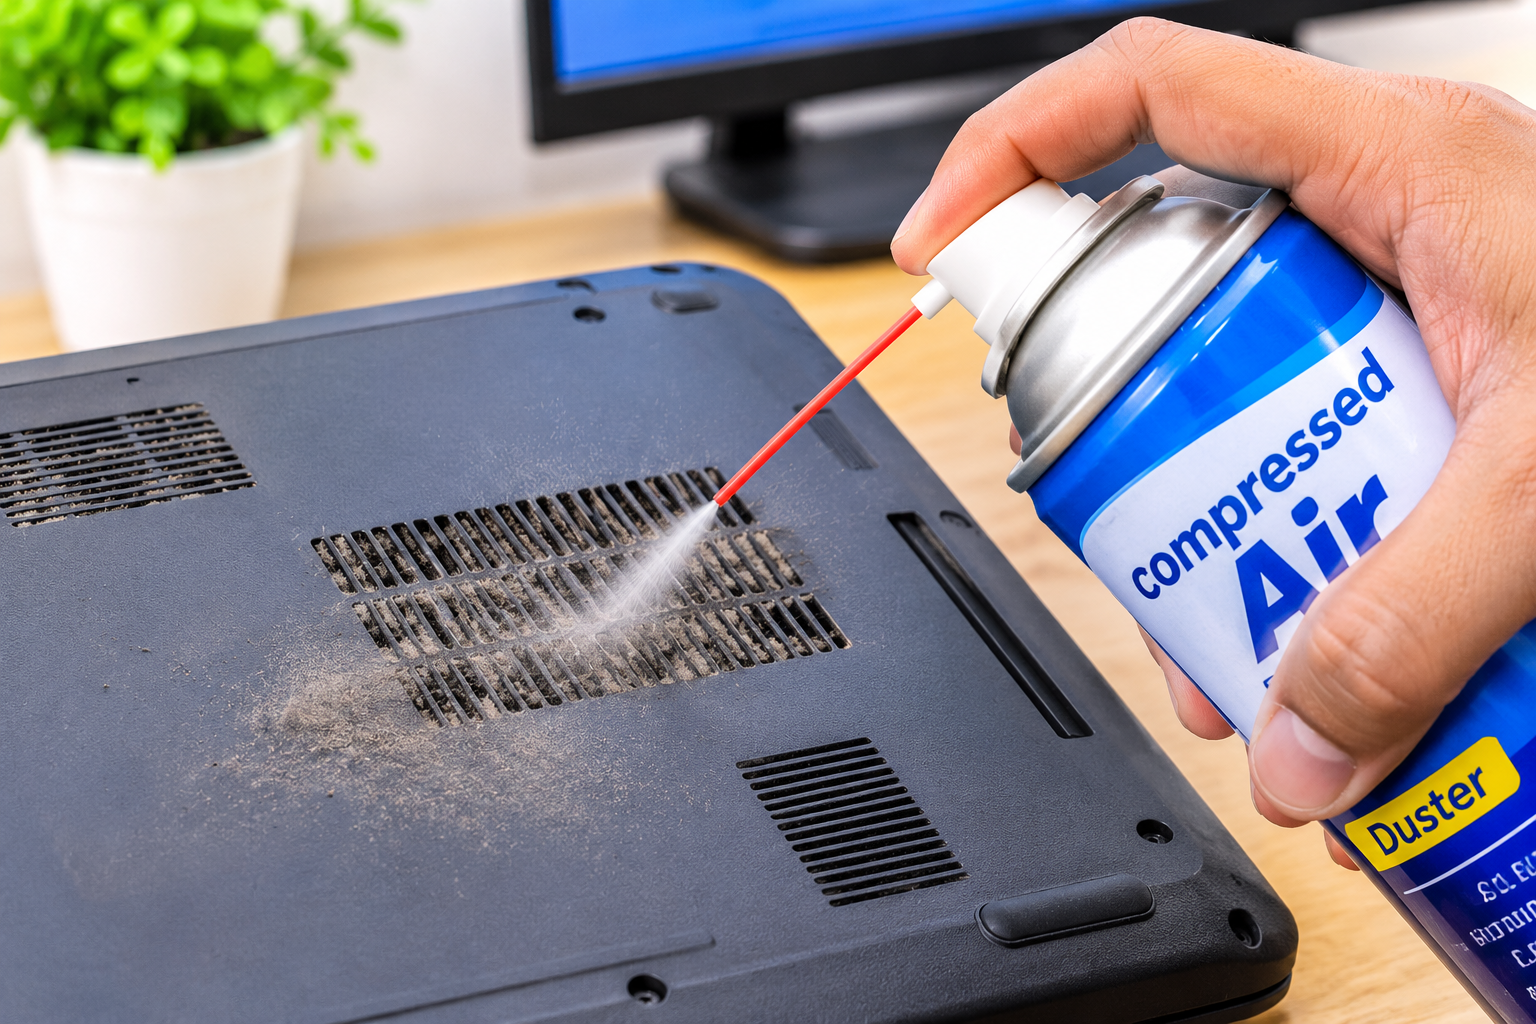
Compressed air through the exhaust vent removes dust buildup that causes thermal throttling
Dust is a silent performance killer. Inside every laptop is a cooling fan and copper heat pipe that transfer heat from the processor to a metal fin array. After 12–18 months of daily use, these fins accumulate a layer of compressed dust that blocks airflow almost completely. When temperature exceeds the designed safe limit — typically 90–95°C for most Intel and AMD mobile processors — the CPU automatically reduces its clock speed by 30–60% to protect itself.
🔧 How to identify and fix thermal throttling:
1. Download free tool HWiNFO64 → Run while doing normal work → Watch CPU temperature
2. If temperature regularly hits 90°C and CPU frequency drops below base clock — throttling confirmed
3. Use compressed air through the exhaust vent while laptop is powered off — hold the fan blade with a toothpick to avoid bearing damage
4. For laptops 3+ years old — replace dried thermal paste between processor and heat pipe (drops temperature by 10–20°C)
India-specific tip: In Indian conditions where dust levels are higher than average, clean laptop vents with compressed air every 3–4 months. A full internal cleaning should be done by a service technician once every 12–18 months.
Adjust Virtual Memory (Page File) Settings
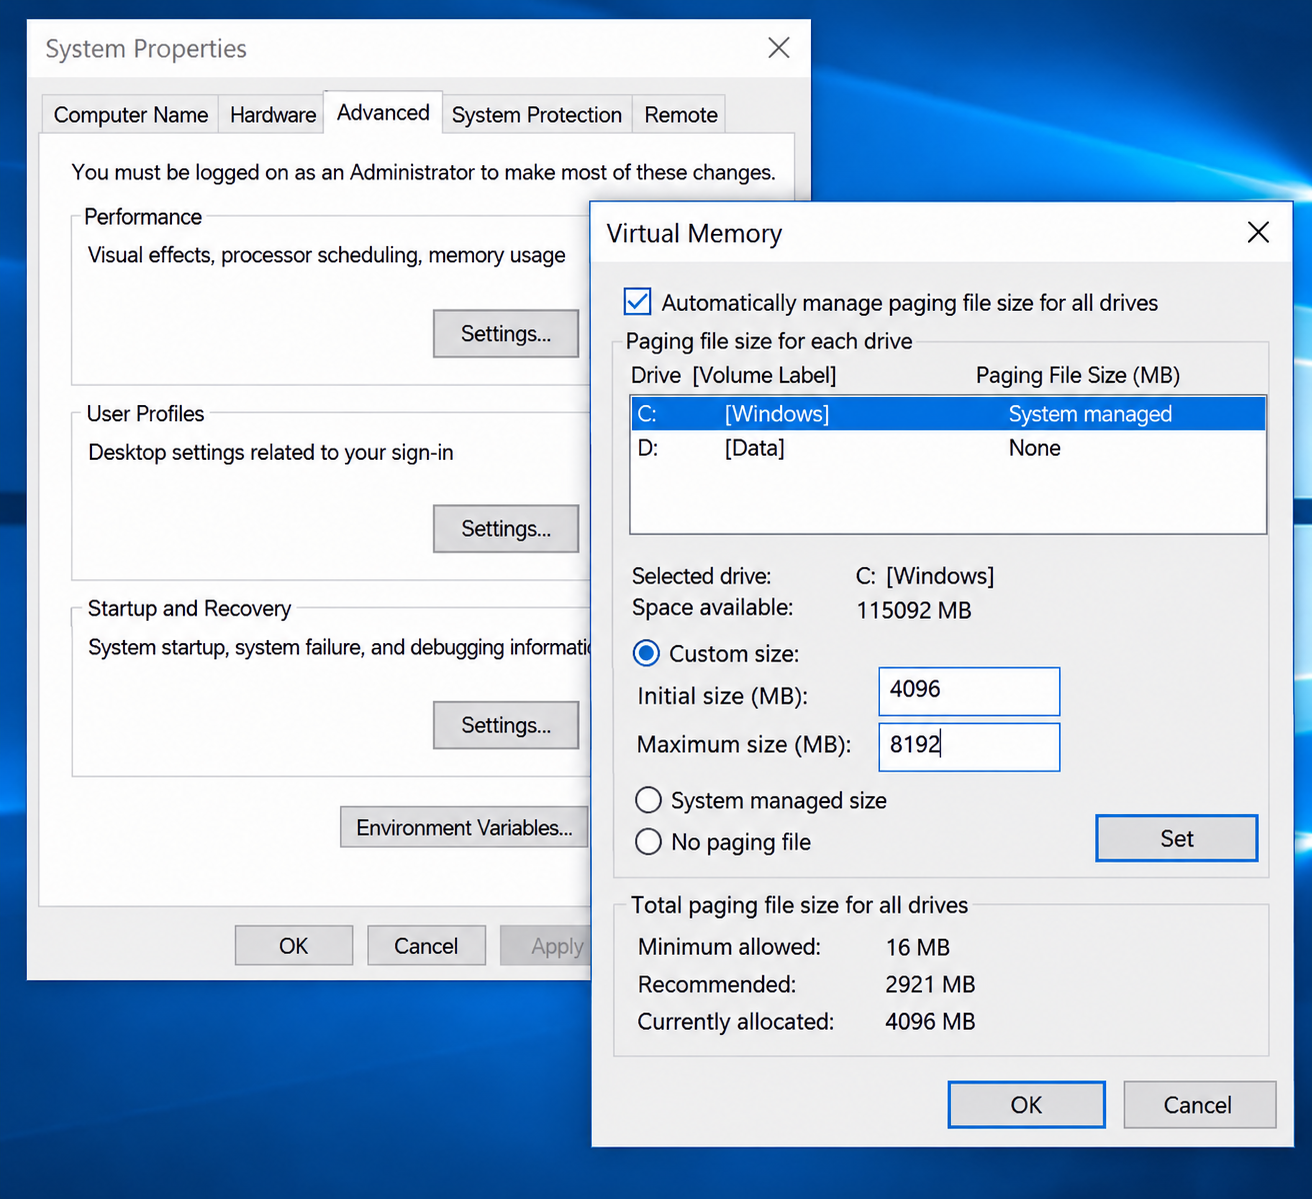
Setting equal initial and maximum page file size eliminates stuttering from dynamic resizing
Virtual memory is a portion of the hard drive Windows uses as overflow when physical RAM is full. By default, Windows manages page file size automatically — resizing it dynamically. This resizing causes unpredictable disk write operations and contributes to stuttering. Setting a fixed page file size eliminates this dynamic resizing behavior.
🔧 How to do it:
1. Right-click This PC → Properties → Advanced System Settings → Performance Settings → Advanced tab → Virtual Memory → Change
2. Uncheck "Automatically manage paging file size"
3. Select C: drive → Choose Custom size
4. Set both Initial and Maximum to 1.5× your RAM in MB (4 GB RAM = set both to 6144 MB) → Click Set → Restart
Disable Windows Search Indexing
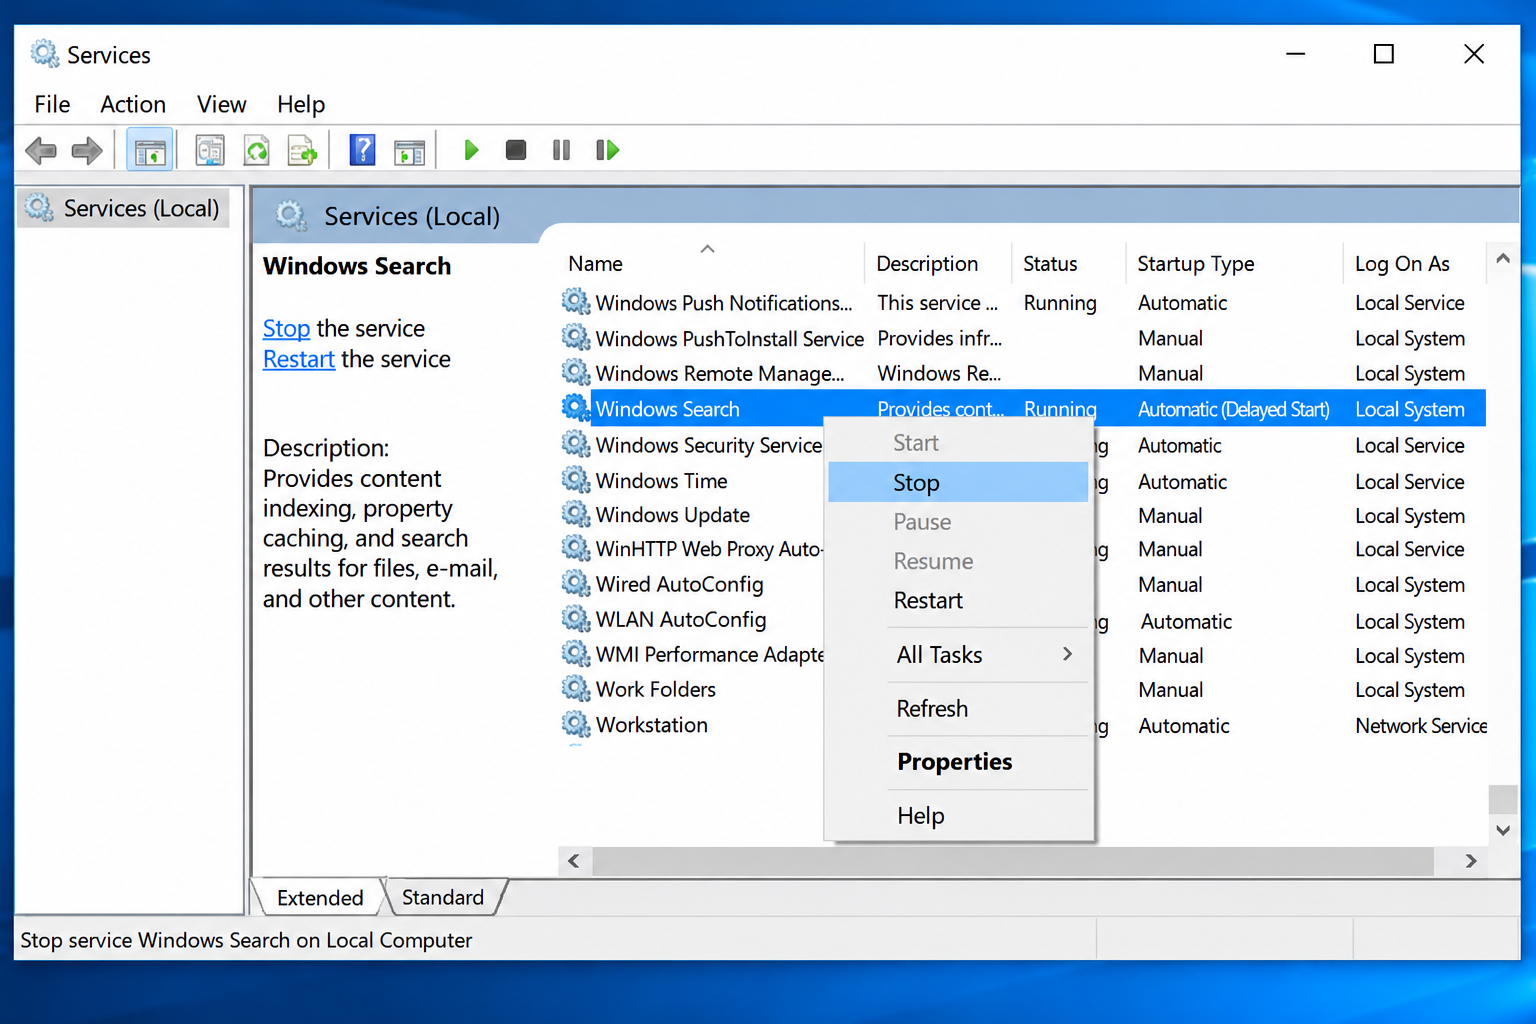
services.msc → Windows Search → Set Startup type to Disabled to stop background indexing
Windows 10 continuously indexes file contents on the hard drive so Start menu searches return results quickly. For SSD users this service runs efficiently in the background. For HDD users, the indexing process competes with normal read/write operations and causes noticeable slowdowns — particularly during the first hour after boot, when indexing activity peaks.
🔧 How to do it:
1. Press Windows + R → Type services.msc → Press Enter
2. Scroll to Windows Search → Right-click → Properties
3. Set Startup type to Disabled → Click Stop → Click OK
⚠ Trade-off: Start menu file searches will be slower. Acceptable for most users who search by filename.
Use a Laptop Cooling Pad
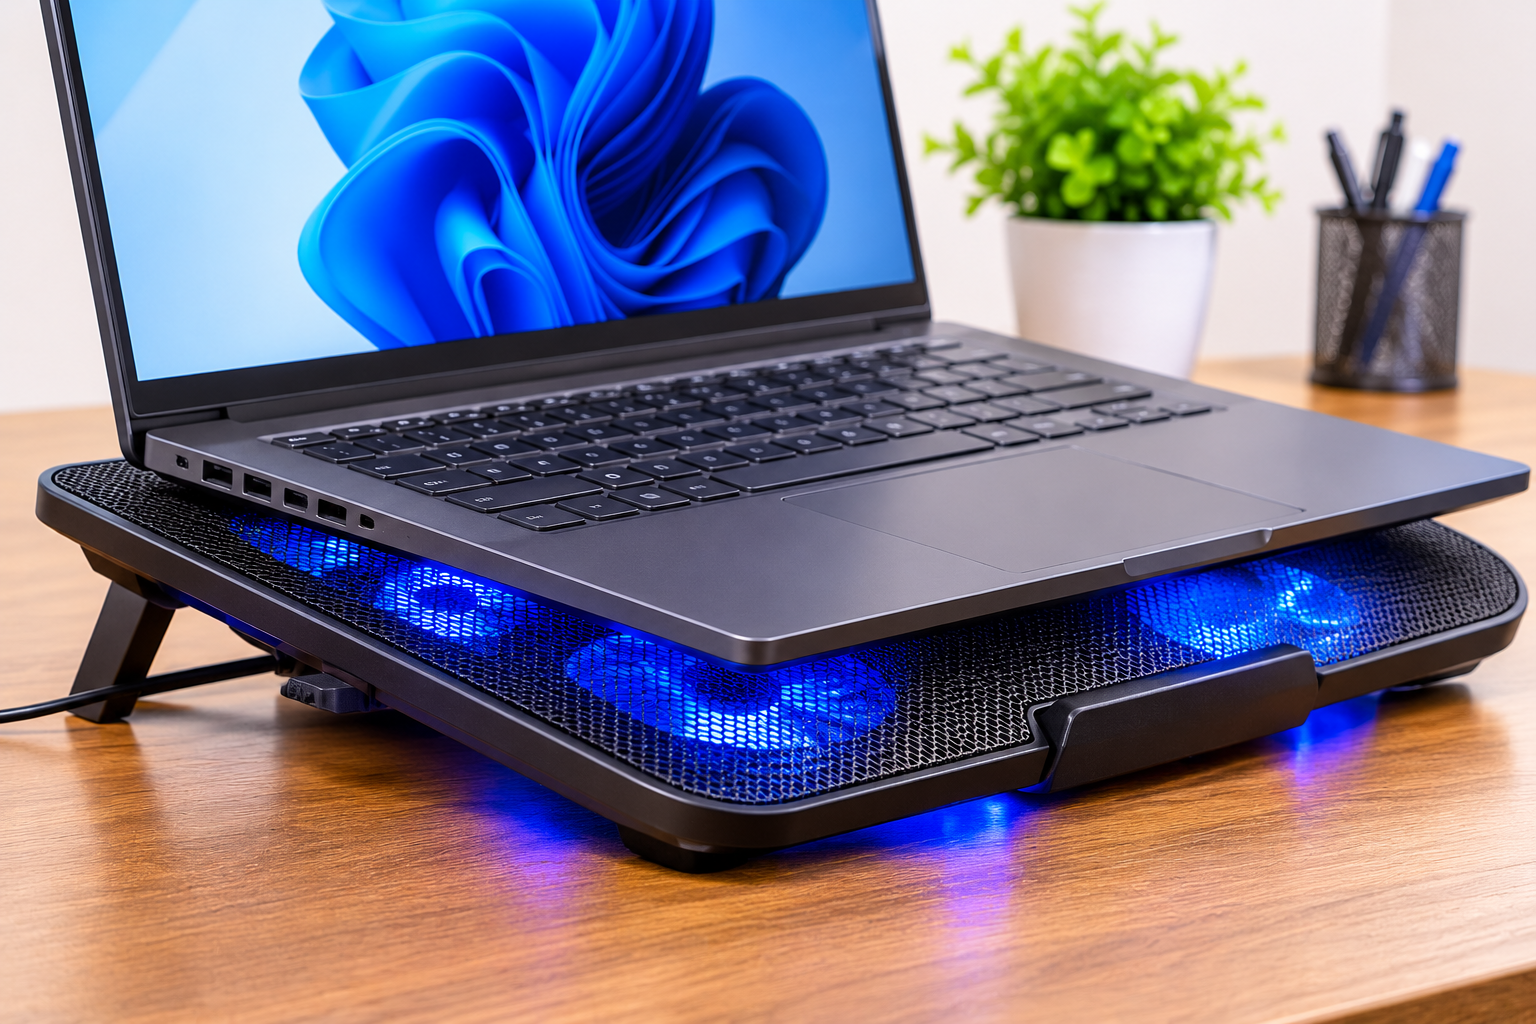
A good cooling pad reduces laptop temperature by 5–12°C — often enough to eliminate thermal throttling completely
For users who regularly use their laptop for extended periods — video calls, online classes, programming, content work — a cooling pad provides a simple and effective way to lower operating temperature without opening the laptop. By increasing the volume of cool air entering through the bottom vents, it reduces the temperature the internal fan has to work against, allowing the processor to maintain its full speed for longer before throttling.
✅ What to look for in a cooling pad:
• Fan placement aligns with laptop's bottom intake vents (usually center or rear)
• Fan speed control for adjusting airflow based on workload
• USB-powered — no separate adapter needed
Perform a Clean Windows 10 Reset (Last Resort)
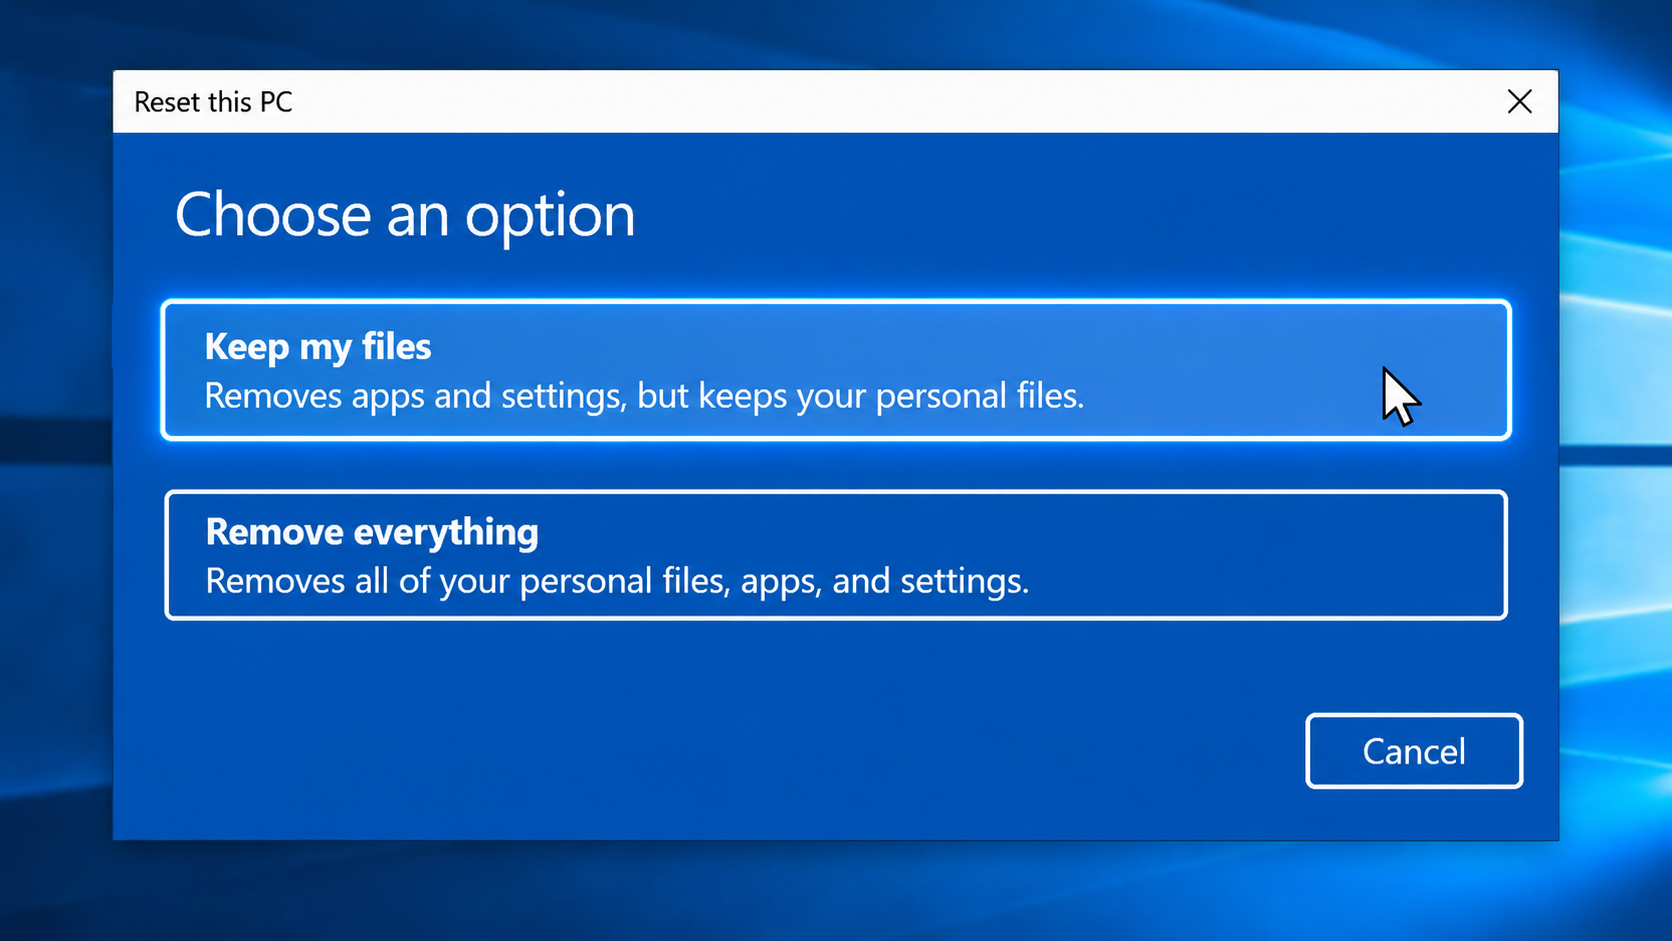
Settings → Recovery → Reset this PC → "Keep my files" reinstalls Windows without touching personal documents
When all other methods have been tried and the laptop still feels significantly slower than it should, a clean Windows reset is the most thorough solution available. This reinstalls Windows 10 from scratch while optionally keeping personal files — removing all installed software, all background services, all corrupted registry entries, and all accumulated system errors accumulated over years of use.
⚠ Before resetting:
• Back up all important files to an external drive or cloud
• Save product keys for licensed software (Microsoft Office, etc.)
• Ensure charger is connected throughout the process
🔧 How to do it:
1. Settings → Update & Security → Recovery → Click "Get started"
2. Select "Keep my files" → Choose "Cloud download" for a fresh clean copy
3. After reset — apply Methods 1–4 first before installing any new software to maintain a clean performance baseline
Frequently Asked Questions
Conclusion
A slow Windows 10 laptop is rarely a hardware problem that requires expensive upgrades. In most cases it is the result of accumulated software clutter, incorrect settings, dust buildup, or aging storage — all of which can be corrected with the methods covered above.
Start with the simplest fixes: disable startup programs, switch the power plan, turn off visual effects, and run Disk Cleanup. If the laptop is still sluggish, check for thermal throttling and clean the vents. If a traditional HDD is the system drive, replacing it with an SSD will produce the most dramatic improvement of anything in this guide. A laptop that gets regular maintenance will consistently outperform a neglected machine with better hardware.